The One Thing That Makes Restringing Safe
Your violin strings need replacing and you've been putting it off. Maybe the E string finally snapped, or the tone has gone dull and scratchy no matter what you do. Whatever the reason, you're now staring at the instrument wondering if you'll damage something.
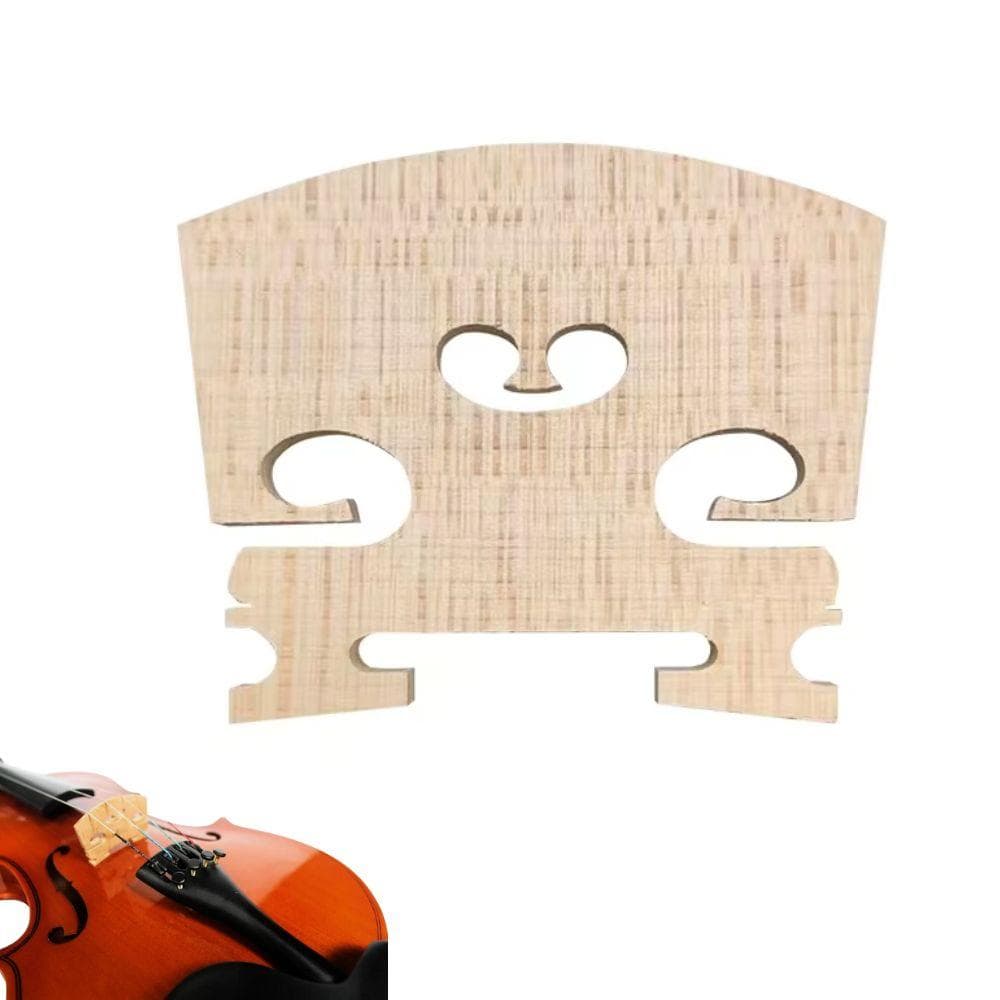
The bridge is the worry. And it's a legitimate one: the violin bridge isn't glued to the body. It's held upright purely by the downward pressure of the strings. Loosen all four at once and the bridge loses its grip — it tips forward or falls flat. If you've heard about the sound post collapsing inside the body when a violin is dropped, you'll understand why people get cautious around bridges.
Here's what those concerns miss: you don't need to remove all four strings at once. Change them one at a time, keep tension on the bridge throughout, and none of that happens.
The Rule: One String at a Time
This is the entire method. Change one string, bring it close to pitch, then move to the next. The remaining strings hold the bridge in position while you work. The sound post stays put. The bridge doesn't shift.
It works for a full set replacement (which you should do every six to twelve months for regular students, or sooner if strings go false or lose response). It works equally well when you're fixing a single snapped string. Same approach either way.
How to Do It: Step by Step
Step 1: Loosen the string gradually.Turn the peg slowly toward you to slacken the string. Don't yank it free. Once the string is loose enough to hold only lightly, slip it out of the peg hole and unwind it from the tailpiece.
Step 2: Photograph the bridge before you start.A phone photo takes two seconds and gives you a reference if the bridge shifts during the change. Look at the bridge from the side — it should be roughly perpendicular to the violin's top, with the back face (toward the tailpiece) vertical.
Step 3: Lubricate the nut and bridge grooves.Before threading the new string, run a soft pencil across the groove in the nut (the small slot at the top of the fingerboard, near the peg box) and lightly over the bridge groove where the string sits. The graphite lets the string settle smoothly as it stretches into pitch, preventing it from catching and snapping when you tune up. This step is often skipped by beginners — don't skip it.
Step 4: Thread the new string.Insert the ball end (or loop end for the E string) into the correct slot in the tailpiece. Wind the string onto the peg, making sure the string crosses over itself on the first turn so it locks against the inside wall of the peg box. Keep the winding neat — bunched-up coils cause pegs to slip over time.
Step 5: Bring to pitch gradually.Wind up to somewhere near tune, then let the string settle for a few minutes before final tuning. New strings stretch considerably. You'll need to retune several times over the first few days — this is completely normal and not a sign that anything is wrong.
Step 6: Check the bridge.Once all four strings are back at tension, look at the bridge from the side again. If it's tipping forward (toward the fingerboard), gently pinch both sides and ease it back to upright while the strings hold it in place. Your teacher can show you the correct angle if you're uncertain — it's worth doing in person once.
Step 7: Rosinate your bow.New strings are smooth and the bow hair won't grip them without rosin. Give the bow a solid application of string instrument rosin before your first session on fresh strings. The improvement in tone is immediate.
What If the Bridge Is Already Warped?
Bridges warp over time — from humidity changes, from strings cutting grooves too deep, or from small knocks during transport. A warped bridge affects intonation and tone more than most students realise, and it's easy to overlook because the change is gradual.
A 4/4 solid wood replacement bridge is an inexpensive fix, but fitting it correctly — adjusting the height and shaping the feet to match the curvature of the top — is best handled by a teacher or luthier the first time. Don't attempt to sand it yourself unless you've seen it done.
A Word on String Selection
If you're not sure which strings your instrument came with, a standard steel-core set is the right starting point for most student violins. String preference becomes more personal as you advance — material, tension, and brand start to matter more from around AMEB Grade 4 onwards.
If you're also considering an instrument upgrade, the Maro student violin sets available in 1/4, 1/2, 3/4, and 4/4 sizes come strung and set up ready to play — useful to know if it's time to move on from a first instrument.
Browse our Orchestral Strings range →
